
🚩 Step 2: Add products to the Catalog
1. Go to the bot Dashboard

2. Think through the hierarchy of categories and products
💡 We advise you to think in advance on the number of categories and their hierarchy (nesting), as well as the planned number of products - this will greatly facilitate your further work with the catalog.
3. Add categories and subcategories
💡 A category can be assigned as a "parent" category to other categories, which then become "subcategories".
⚠️ Adding products to a parent category is not recommended.
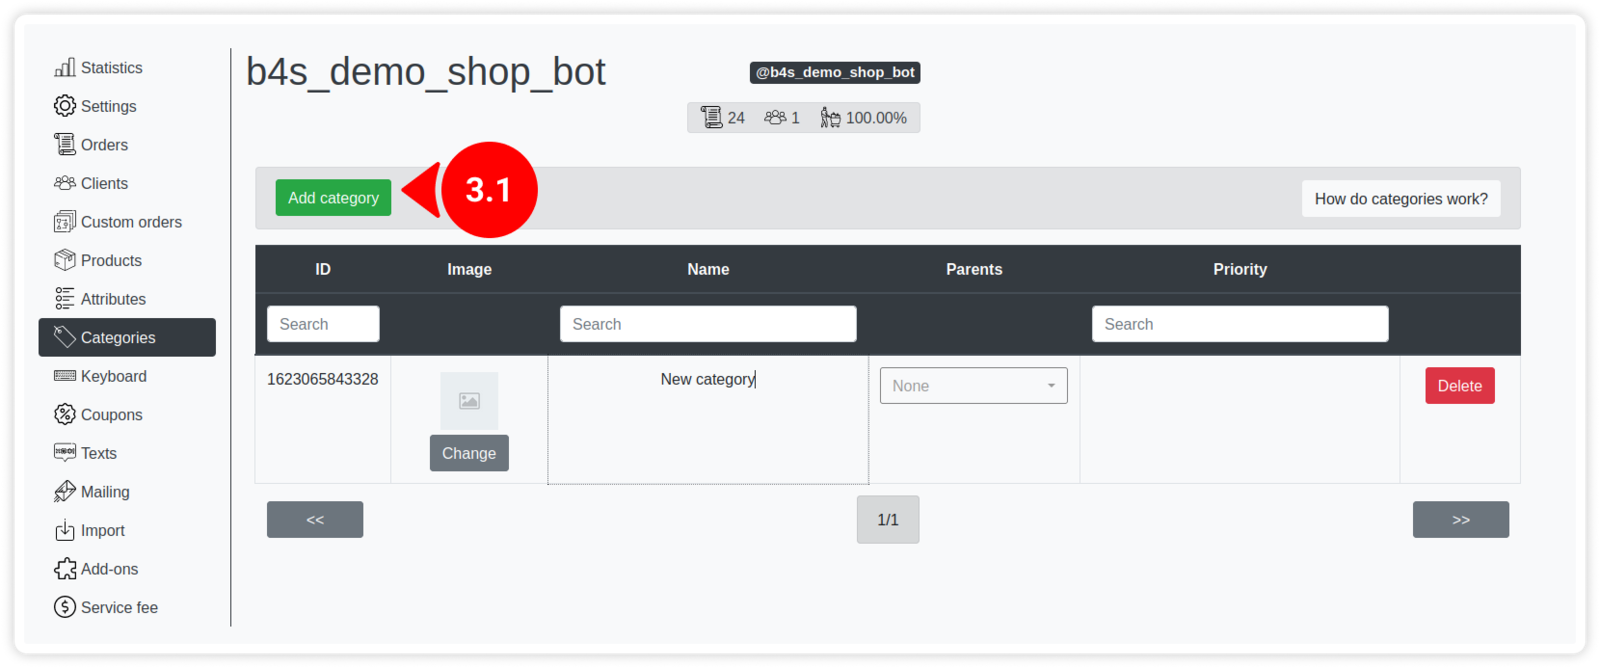
3.1. Go to Categories → click the green Add category button.
After that, you will have a so called "template" for a new category added.
To edit a category template, click on the needed fields in the table.
4. Add products and their variations
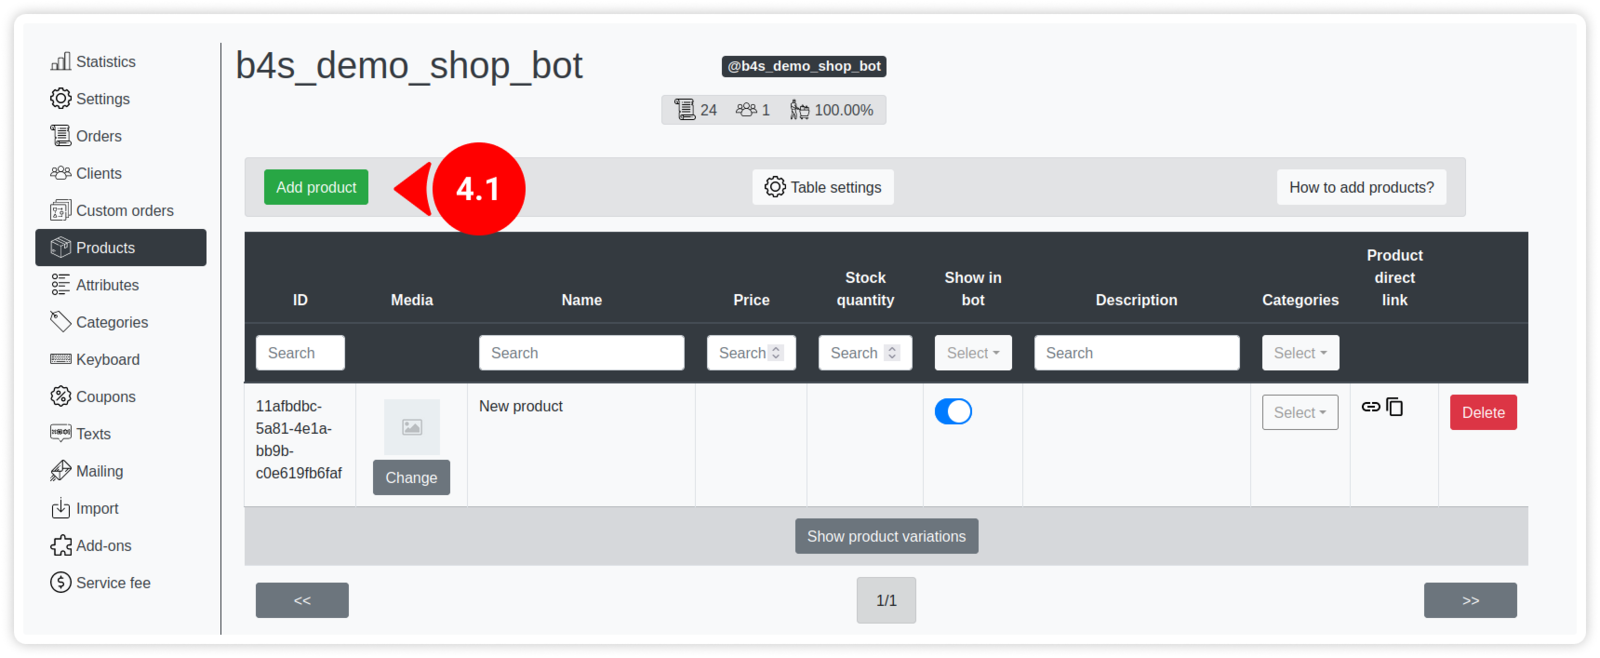
4.1. Go to Products → click the green Add product button.
After that, you will have a product template added.
The product template can be edited the same way as the category template.
✅ Learn more about the fields of the products table in the Appendix: 🛒 Products: Table Fields description
To upload a product picture, click the Change button in the Media column and select the file.
💡 All pictures uploaded through the dashboard will be stored on our server - this will positively affect the speed of the bot.
⚠️ The main product fields are displayed in the main table by default. Additional product fields can be displayed by clicking on the "Table settings" button.
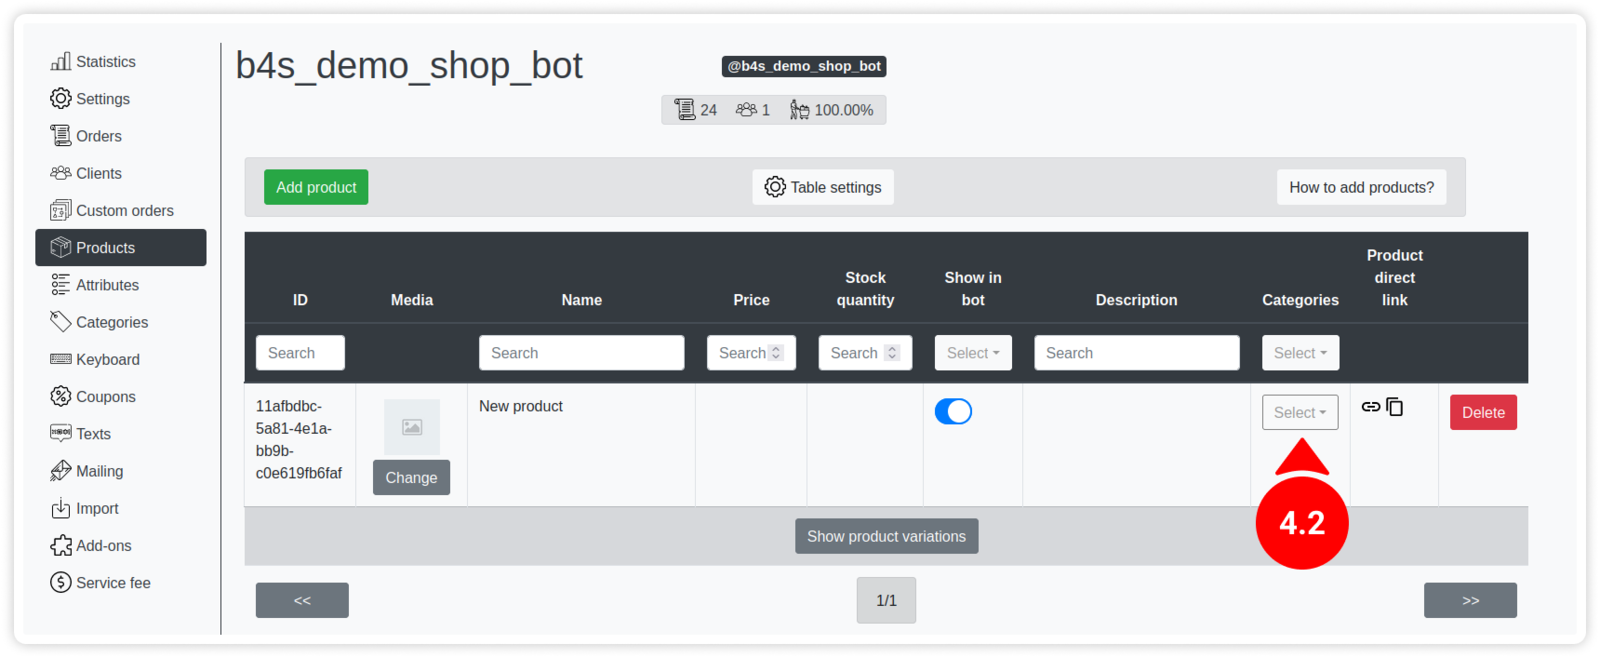
4.2. Sort products into categories you have created.
For each created product, you can add its variations.
Product variations are used to add different configurations, sizes, colors, etc.
💡 If you are adding variations for a product, then add at least two, otherwise there is no point in adding product variations at all.
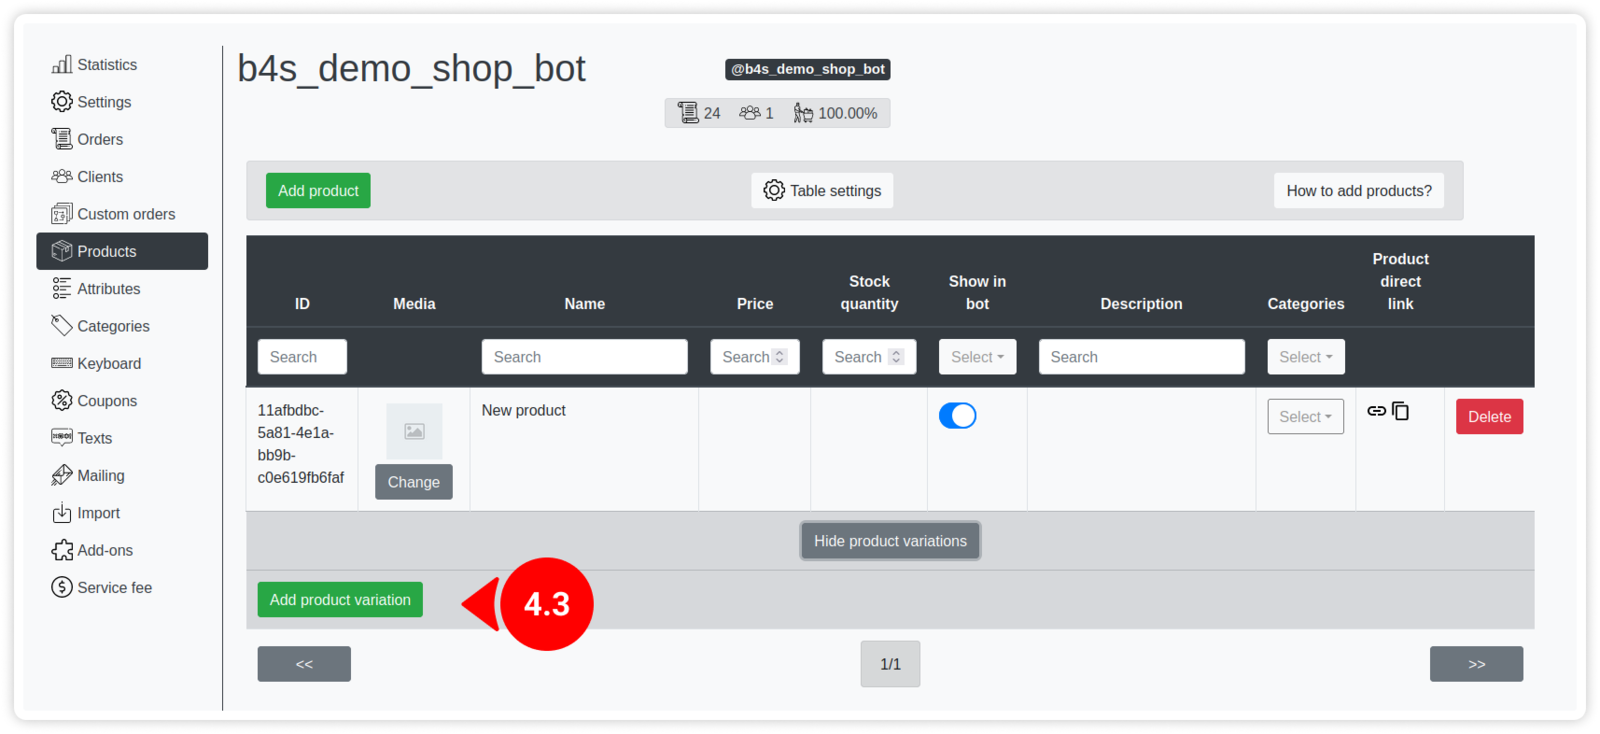
4.3. To add a product variation, click Show product variations → Add product variations.
After that, you will have a product variation added.
The product variation template can be edited the same way as the product template.
5. Proceed to the next step!

Updated on: 14/05/2023
Thank you!